A printer at home, a few photos of my dog, and a test to see how much Codex could figure out with very few instructions
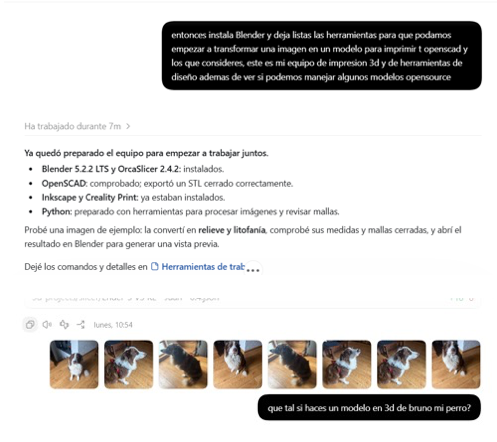
Monday was a holiday here, so I spent it playing around with AI. I have a 3D printer at home and wanted to put it to use, so I started by asking Codex to set up my computer with whatever software we’d need to work together. Then I gave it a few photos of Bruno, my dog, and asked it to make a model I could print.
The idea was to see how much it could figure out with very few instructions. I didn’t want to spend time writing some giant prompt. I’d rather just watch what it did. If I liked something, I told it. If it came out horrible, I told it that too. And yes, some of it was horrible, hahaha.
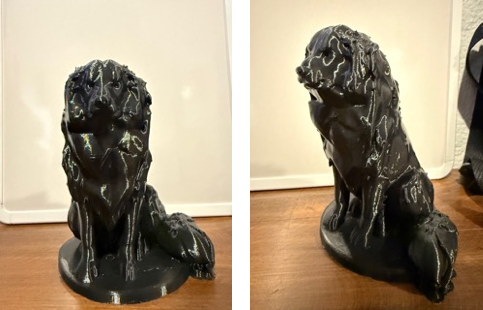
We ended up with a black PLA figure of Bruno, about fifteen centimeters tall (around six inches). A decent result, with room to improve, but it was my dog turned into something I could put on the table. I don’t know how to do 3D modeling. That’s exactly why I think it’s worth telling how we got there.
The first results were horrible
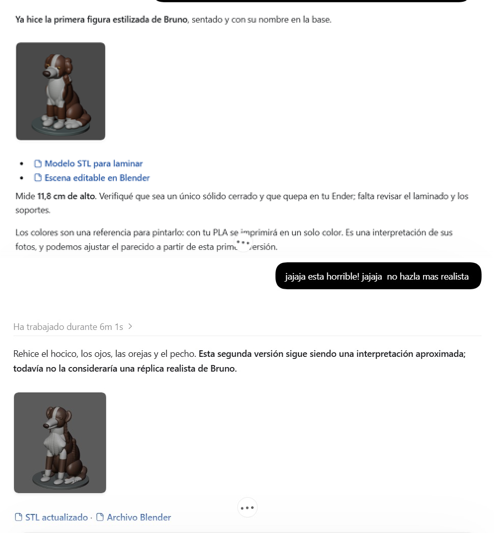
Codex installed the tools, including Blender and OrcaSlicer, and started working with the photos. The first figure had Bruno’s colors, it was sitting, and it even had his name on the base. But it didn’t really look like him.
My feedback was pretty blunt: “hahaha it’s horrible”. I asked it to make it more realistic. It adjusted the snout, the eyes and the ears and showed me another version. I still couldn’t see Bruno in it.
I asked it to find a way to rebuild him with AI and generate an image that was actually worth printing. Codex set up and tested a few reconstruction tools. It generated a reference of Bruno sitting, without his harness, on a thin base. That one I liked: “this image is amazing”.
From that reference it built the 3D model. Then another problem showed up: he came out fatter. Bruno is a border collie, and he’s a lot leaner than that. I told it so. I also said the face and snout needed to look more like his. In one version it looked like part of his lower jaw was missing.
That was the kind of instruction I kept giving. I’d look at the next version and say what I liked and what looked off. Codex worked out how to turn those comments into changes to the model.
I gave my opinion on Bruno and Codex handled the technical part
To fix the body, it adjusted the torso and the volume of the reconstruction. To improve the face, it worked on that area separately and then merged it back into the rest of the figure. It kept writing and running code, using the tools and checking the result.
What caught my attention was that I could take part through something really simple: recognizing my own dog. I could say he looked fat or that the face needed work. Codex figured out what to do with that and showed me the next result.
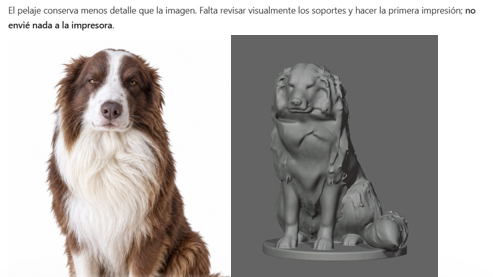
The generated image had more detail than the 3D volume we got. Going to three dimensions simplified the fur and the expression. You can see it in the comparison and in the final piece too. We got to an approximation we could print and keep improving.
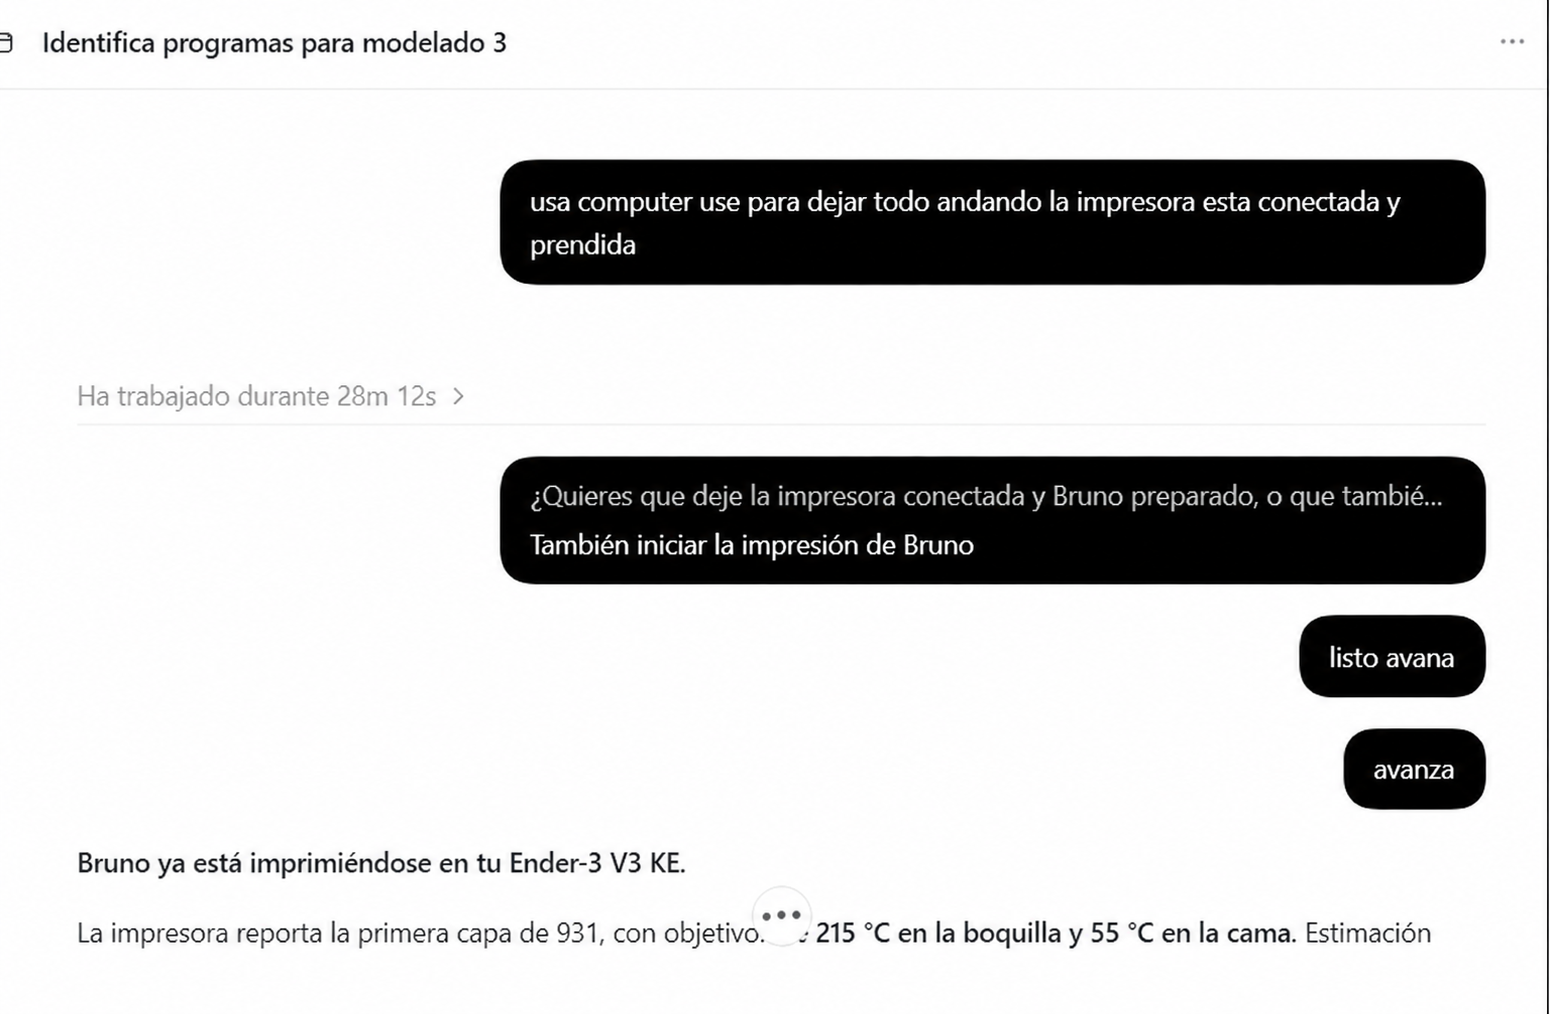
Then I asked it to connect to the printer and get everything going. Codex already had the model and the print file ready. Before starting, it asked me whether I just wanted everything set up or whether it should start the print too. I told it to go ahead and print Bruno.
It used Computer Use to work the interface of my Creality Ender-3 V3 KE, and the job showed up as active. The file had 931 layers. The software estimated about eight hours and sixteen minutes and 156 grams of PLA, though those were just the slicer’s numbers. The camera wasn’t available, so checking how the piece was actually coming along still meant going over to the machine.
A few hours later, we had Bruno
The next day I sent the photos with a short message: “this is how it printed”. There was the figure, with his paws, his chest and his tail off to one side. The face can still get better. For a test, the result was decent, and it made it clear what we’d need to work on in another version.
What stays with me is how the project moved forward. I started by asking what we needed and kept giving my opinion on whatever came up. Codex took care of finding the tools and solving the technical steps between the photos and the file that ended up on the printer.
This is what gets me excited: being able to try something I don’t know how to do, bring my own judgment, and have help taking it all the way to a real result. In this test, my comments about Bruno were enough for the model to keep getting better. There’s huge potential in working like this with the equipment we already have at home.
We went from a conversation to a figure sitting on the table. And that’s already happening. Wow.